DIY Dried Flower Frame
After months of planning your dream wedding, suddenly it’s over. All of the details you pined over for the past year waiting to be boxed up, thrown away or donated. Luckily for us DIY-ers, there are plenty of ways to reuse wedding décor, add a very personal touch to your home, AND get a daily reminder of your special day.
I’m all about memorabilia, and my bridal bouquet was something I definitely wanted to remember. I decided to try a couple different DIY projects to preserve the flowers: hanging a bridesmaid bouquet to dry and pressing my bridal bouquet flowers to create a DIY piece of art for our home. I am obsessed with how the framed flowers turned out and get to walk past it every day in my hallway!
What You’ll Need:
- Kitchen scissors
- Books
- Paper
- Large floating frame (The biggest I could find was 20×24)
- Hot glue gun (I used a flower detail glue gun and it worked great)
- Optional: vows printed on paper
- Optional: ribbon from bouquet

Florals by Ahnalise Draper @gingerroots_ca
Disassemble Your Flowers
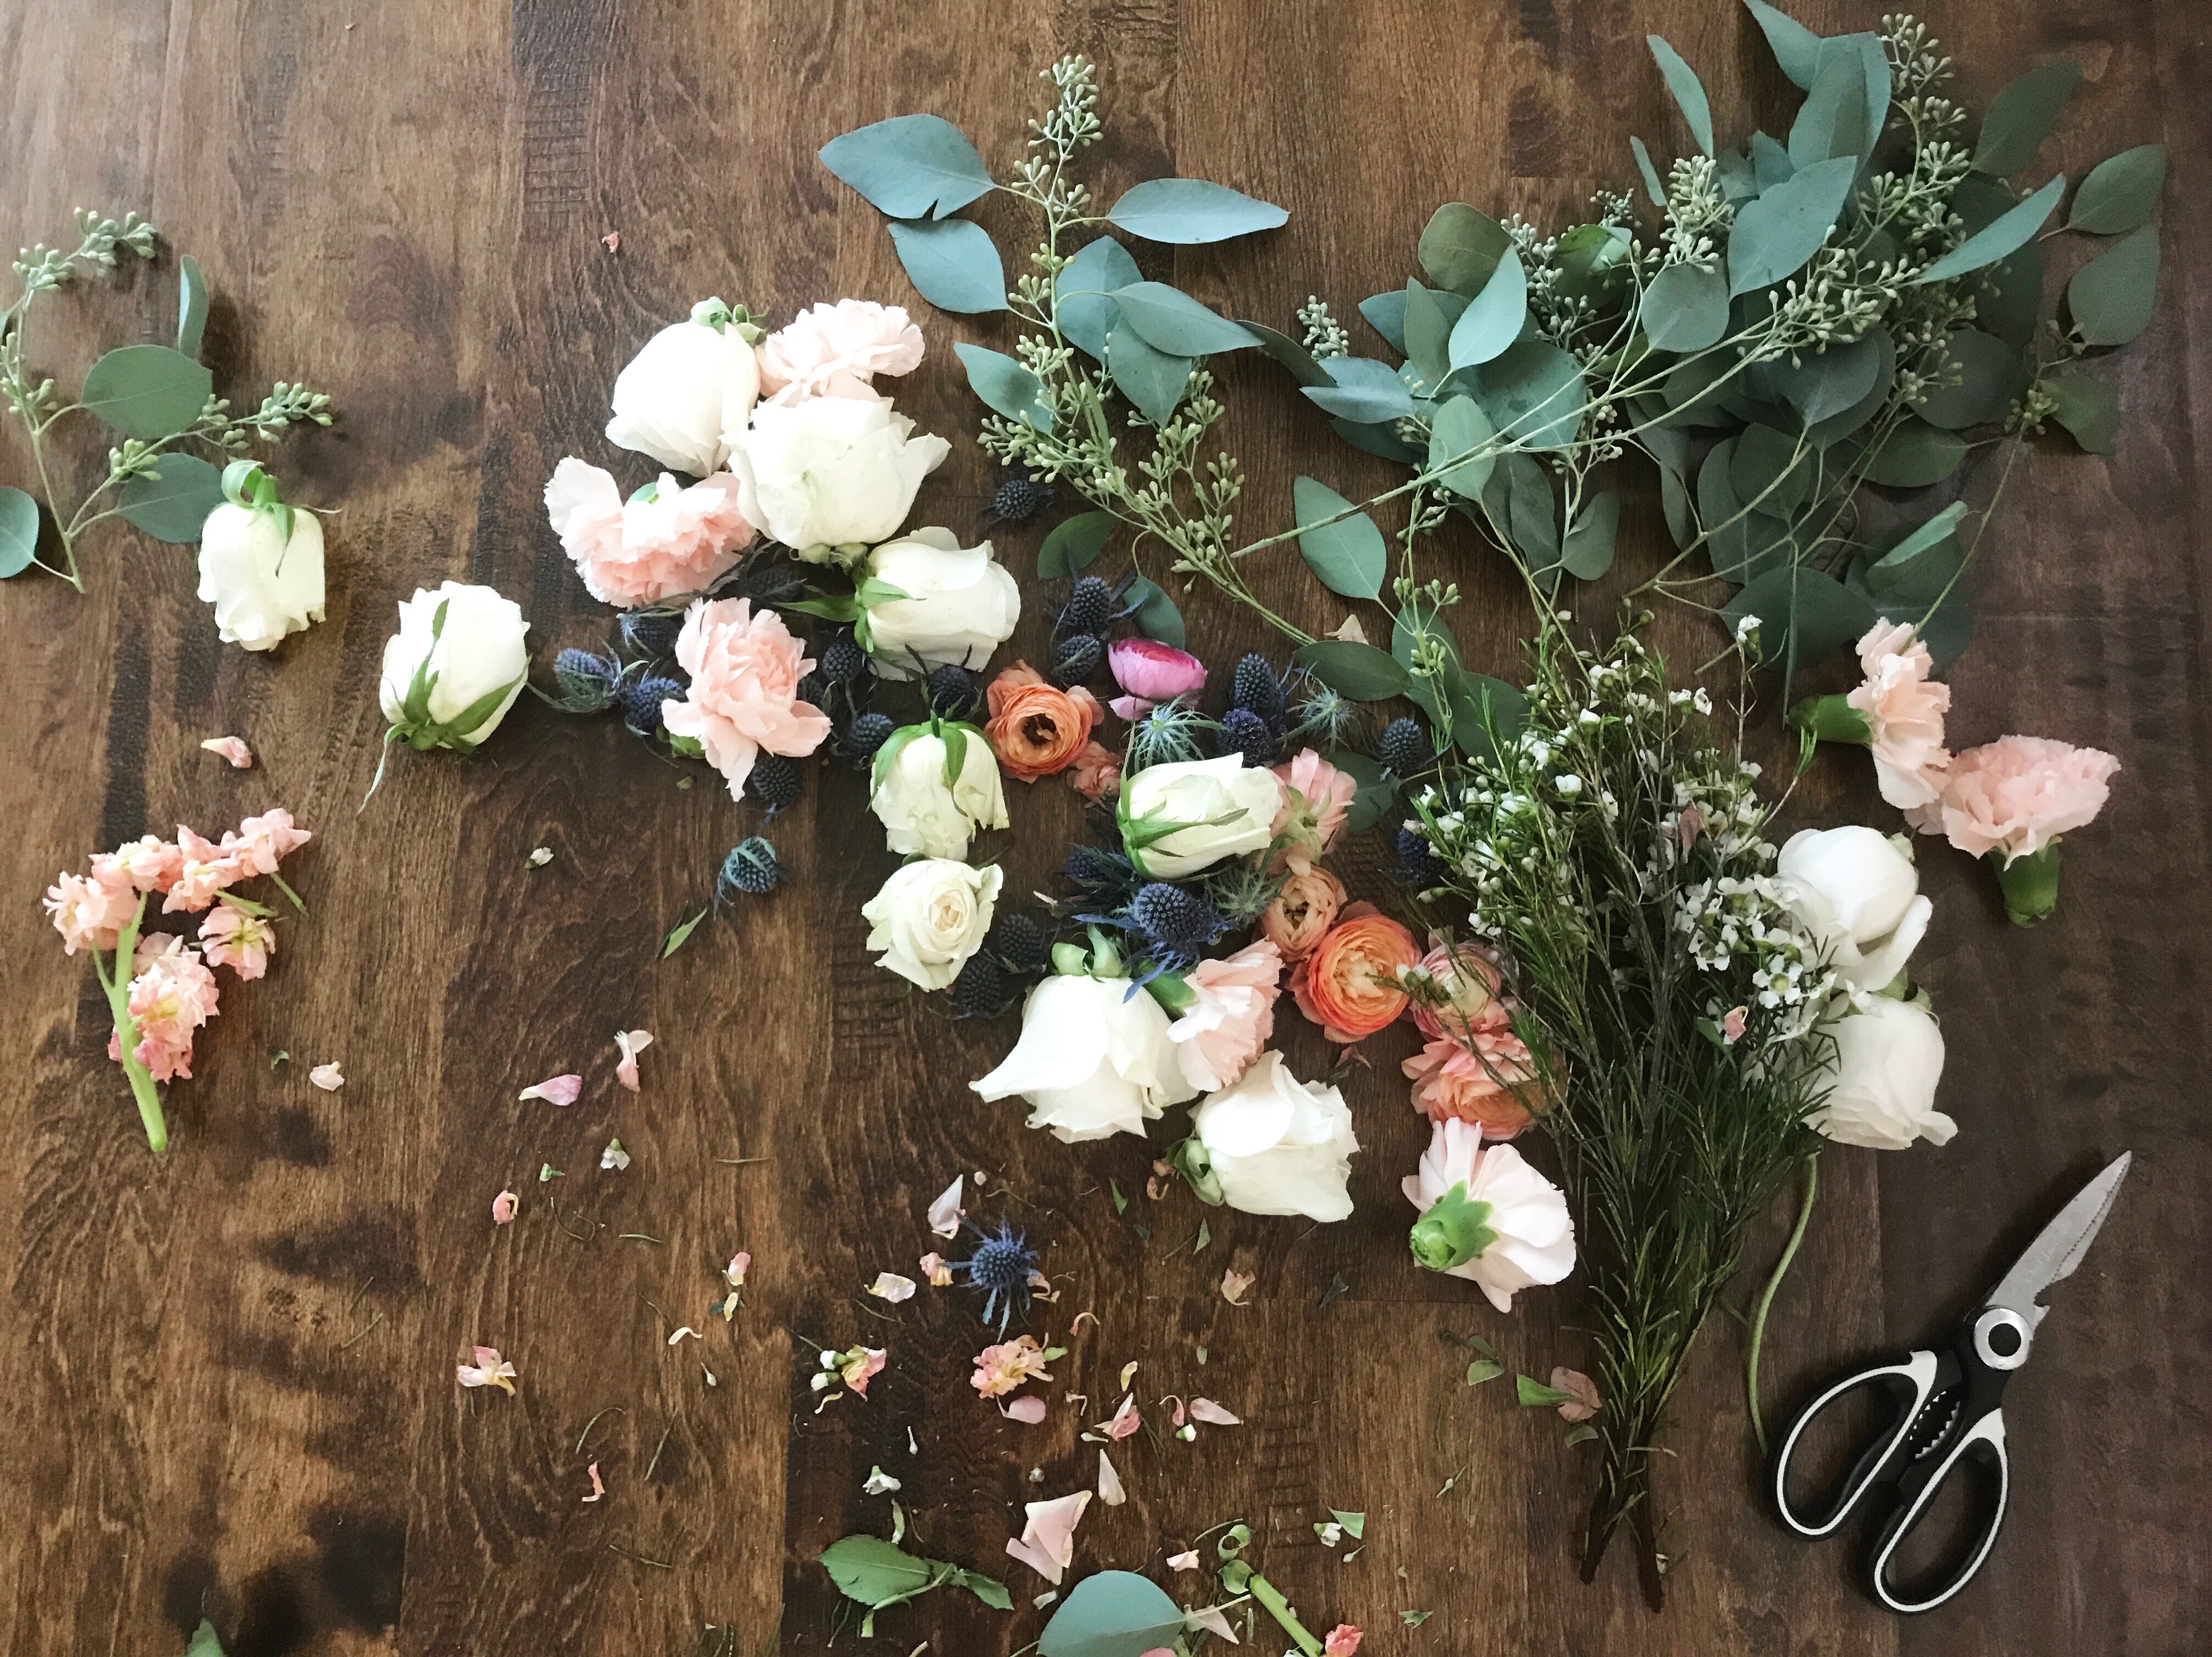
The day we got home from the wedding, I set to work on cutting flowers from my bouquet off each stem. I cut most of them to ensure I had plenty for the frame. In retrospect, I would have let them dry out a for a couple more days.
Thicker flowers like roses can be cut in half or you can pull out as much of the center green part as you can to spread it out in a circle. I ended up liking the round ones best after they dried.
Dry Your Favorites
Place flowers between two sheets of parchment paper and squash down inside a book. After you’ve gotten all of your flowers inside of books, pile them in stacks in a closet or other dark space. Add some heavy books on top to weigh them down more. After at least two weeks of drying, you can gently take out your flowers.
- Blue thistle surprisingly dried perfectly in its full form, although I did try cutting them in half as well.
- Carnations ended up not looking so pretty, so I used them underneath other flowers to add texture.
- Peonies kept the most color, especially the pink one in my bouquet, which turned out to be a pale shade of purple when dried.
- Snapdragons turned out great and I wish I had dried more!
- Greenery and wax flowers made for nice borders around the vows sheets and other flowers.
NOTE: Make sure to let them dry out for a couple days before pressing them. I pressed them right away when they still had water in them so some of the larger flowers, like the roses, ended up ruining pages in my books and molded a bit during their time in the closet.
Arrange & Glue
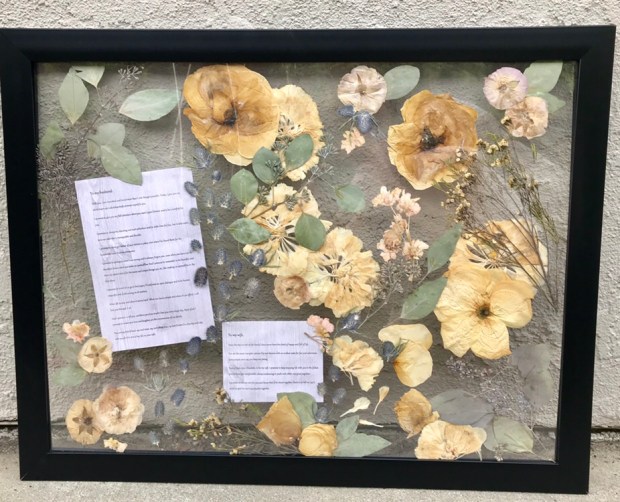
Now comes the fun part and probably the toughest, since your flowers will be fully preserved (AKA not moving) once you glue everything down. I printed our vows on paper that looked like wood to go along with our rustic wedding theme and placed the flowers around them. You can also incorporate other flat items, such as the ribbon from your bouquet.